top cafe chiang mai work digital nomad
Adventures in Thailand, lifestyle, travel

Top 5 Best Cafés to Work From In Nimman, Chiang Mai for Digital Nomads

Best cafe chiang mai work

I’ve been living in Nimman, Chiang Mai for the past 3 months with the sole focus of setting up my yoga business Eka Bhumi Yoga and I’ve been to many (many) cafés around Chiang Mai. We tend to stick to the ones in the Nimman and surrounding area as opposed to the Old City because they are usually more spacious and less busy.

My criteria for a good cafe to work in is:

  • Air Conditioned
  • Ergonomic chair to table height ratio (not just coffee tables and couches).
  • Not too  loud with good air quality (not like The Camp in Maya Mall which is always packed with digital nomads and students and smells a little stuffy).

These are my top 5 favourite ones to work from:

#1
The Barn Eatery And Design

the barn best cafes to work in chiang mai
Opens at: 10:00 AM – 1:00 AM
WiFi: Strong in the mornings before the university students start to arrive at lunch time
Price of an Americano/cappuccino : 45/60
Coffee tastes : Decent

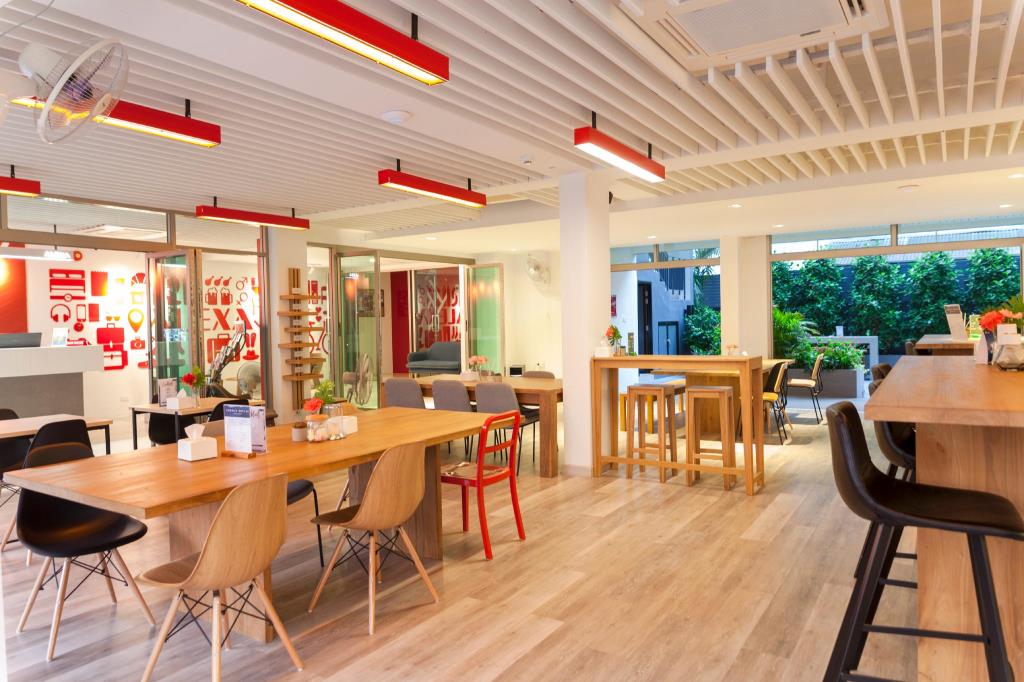
I love this place. It was built by a few architecture students as a final project and it is truly beautiful and inspiring.

Maybe because I’m sitting in such beautiful surroundings with natural lighting or its indie music they play here, but I found myself doing some of my best design work here. Like attracts like.

A lot of love, passion and thought went into the creation of this place and it has great vibes.

They offer a simple food menu (around 89 baht/dish) and the portions although small are very tasty.

#2
Wawee Coffee (Nimmanhaemida Road branch)

Opens at: 7 AM – 8 PM
WiFi: Medium-Strong, depends on how busy it is
Price of an Americano/cappuccino : 65/65
Coffee tastes :  a little on the strong bitter side which I like 🙂

Wawee coffee is a coffee chain in Thailand and boasts many locations in the country and about 10 in the Chiang Mai area itself. The one I like and where this article was written is this location.

We love this place because it’s opened early while most cafés open around 10. So it’s perfect for an early bird like me. It’s also set in a little boutique shop complex and has a 7-11 close by.

#3
Rustic & Blue (back room area)

Opens at: 8:30 AM – 10 PM
WiFi: Strong
Price of an Americano/cappuccino : 70/95
Coffee tastes : Good – western, farm to table style

This place has great coffee and WiFi, but be warned that they charge western prices – we always end up spending way too much money here.We like to camp out in the back separate air-conditioned section of the place where there are large tables and it’s quieter, but the usually close this section off by 2PM.

If you’re craving some farm to table type of food, this is the place for you.

#4
UResto&Liqour

Opens at : 8.30 AM till late 
WiFi : Always strong because it’s usually empty.
Price of an Americano/cappuccino : 65/75 (50/60 on special at time of writing). 
Coffee taste : Depends on the barista, the guy in the morning is a really good barista and then the coffee is shit not as good after he leaves.

Finally, I need to mention this place because it is completely off the radar due to its misleading name.I spent many, many hours working here because the place is modern, spacious and open (a little quirky Thai style decor here and there) but it was usually quiet with no customers and thus the WiFi was amazing.

Sometimes the staff play the music a little loud but you can tell them to turn it down a little.

You also get a loyalty card and stamps for every coffee and food dish ordered which is really nice touch. The food available here is local Thai and costs about 40 baht for the typical Stir Fried Basil Dish, 10 baht more for a fried egg. 65 baht big bottles of Chang are also nice way to end the work day.

#5
Ab Petite Cafe

Opens at: 11AM – 8PM (closed on Tuesdays)
WiFi: Medium, can be patchy in the afternoons
Price of an Americano/cappuccino : 40/55
Coffee tastes : Drinkable

Popular with Japanese expats (they also offer menus in Japanese), Ab Petite is a cutesy cafe that is spacious and reasonable. Best to work on articles here for a few hours. They also serve food at reasonable prices.


Although working from my apartment is do-able and cheaper…I know myself. And if I’m left to my devices in my apartment, I tend to procrastinate more, watch movies or paint my nails.

So going to a cafe forces me to put 4 hours aside for pure productiveness, then I usually go for food. And then rinse and repeat.

Happy working everyone!

NOTE TO READER :
If you found this article useful, please do give me a like and follow my blog. This is the currency that bloggers and digital nomads like you and me survive on, so do be generous as it doesn’t cost you anything!


Worthy Mentions that Didn’t Make the Cut

ALEXA Hostel

top cafe chiang mai work digital nomad
This didn’t make my list because it didn’t match my criteria of needing to be air-conditioned, but it’s really nice to work here in the mornings and on cooler days. Large tables and clean minimalist surroundings allow for a good flow of chi, ideas and work to be done in this space. There is always a western manager around keeping an eye on things and they give you a loyalty card for coffee as well. Coffee prices are 65 for Americano or cappuccino.

No. 39 Cafe

This cafe is hidden near the foothills of Doi Suthep and doesn’t have that much of a working area but the grounds are really unique and relaxing. Look, so pretty!

top cafe chiang mai work digital nomad

travel

[More Info] Extra info and tips for the Acatenango Hike November 2017 (Part 2/2)

This post is about extra tips and information of the Acatenango Hike. Read this other post first.


22852967_10155615003226539_7307572685014873447_n

In this post I will cover:

  • Trail Details
  • Difficulty Level
  • Toilet
  • Descent / Going Down 
  • Other Tips


1) HIKING TRAIL DETAILS FOR ACATENANGO VOLCANO

Summit : 3,976 metres
Basecamp : 3,175 metres
Trailhead : about 2,300 metres
[Antigua: 1,533 metres]

Elevation Gain:
Day 1 Trailhead to Basecamp :
875 metres
Day 2 Basecamp to Summit : 
801 metres
Total Elevation Gain :
1,676 metres

2) DIFFICULTY LEVEL

Okay, the Difficulty Level, really…

Some people said that this is the most difficult hike they’ve ever done, and to be honest I was getting a little bit psyched whether I should do it since my knee has been “off” from a half marathon about a year ago. Here’s what I think:

 It is “Definitely Difficult,” as they say BUT….

.
.. Is it that difficult? 
In my opinion…No, not IF you’re physically fit. Because:

(a) you stop every 20-30 minutes or so for breaks
(b) everyone in my group, even those in sneakers (don’t wear sneakers) finished. Struggled, but finished.

A 1,500m elevation gain and hiking up at 4AM in scree is not fun, nor easy. And the elevation makes you short of breath much quicker, hence the frequent stops. If that didn’t makes any sense, you will struggle. If you don’t know what “scree” is, you will learn what scree is and hate it going up. And you may hate it or love it going down.

It’s so do-able though so don’t let anyone scare or discourage you if you’re a decently fit person.

If by any chance you’re from a mountainous region, you’ll be even better off. A Norwegian couple in my group didn’t find it difficult after recently been hiking in the Rockies in Canada, where I’m from. My tent mate a 49 year-old runner managed just fine too (3 litres of water was not enough for him btw).

I found it to be a mixture between 2 hikes I know from the Rockies: The first 2-3 hours were like of the mid-section of Yamnuska, following 2-3 hours (completed in the wee hours) to be like upper part of Cirque Peak in Banff National Park.

4) TOILET
There is almost no coverage for peeing or pooping up at basecamp. This is especially more difficult for women.

There was only one makeshift outhouse shared by two sites. Bring toilet paper and hand sanitizer.

Best to empty your bowels before you go up.

3) GOING DOWN
Scree (loose rock) it the funnest part. You hated it going up but you’ll love it going down.

If you’re not used to it can be a little bit scary going down on. But you just lean back and keep lifting your legs.

Something to try is linking arms with a partner and bolting down as fast as you can. It feels a lot more stable and insane fun.

Also, going down can be a little hard on the knees, especially if you have had trouble from them before (like me!). Getting knee guards in Antigua beforehand may be a good idea.

4) OTHER TIPS
Hiking pole: Not necessary but helpful to have. If you don’t have one you can buy a stick for Q50 at the base.

Water: Drink all day the day before to make sure you are properly hydrated. Dehydration increases your risk for pulling muscles and injury. At high altitudes, you are losing more water than you would at lower elevations.

Food: Bring extra food. The food portions are Guatemalan. And you will be hungry.

Camera: If you want to capture the lava at night, bring a proper camera. It was hard to capture on my phone.

Altitude Matters!
Don’t neglect this important part. Altitude sickness occurs 2,500 metres. If this hike is scheduled at the beginning of your trip and you are not used to that elevation, just take that into account. If you don’t know what the elevation of your current city is find out. 3 people in my group were affected by it.

Cold: I’m from Canada and it’s cold. Warm jacket (can be borrowed from Gilmer’s place) gloves, scarf and the likes.

travel

Watching Volcano Fuego erupt in Guatemala. (Part 1 of 2)

[Review of the Acatenango Hike November 2017]

Q: Was watching a volcano erupt lava on my bucket list?
A: What, you can do that? Then YES.

That’s pretty much how it went down for me.

bc59cd8fefcd426_bb07c0eea5eb72118fd7baff2fdd9775

WHAT IS IT?

  • A 2 day, 1 night hike to the top of dormant Acatenango volcano to watch active Fuego volcano erupt every half hour or so.
  • Overnight stay required to see the lava clearly.
  • You need to be in Antigua the night before since the companies begin pickups at 7.30 AM. The hike doesn’t actually start until about 10:00 AM.

HOW MUCH?

  • Going rate is 400 quetzales (about $55).

Some companies  charge more but in my opinion you’re still tenting at the end of the day. And I got a Marmot tent, so there. Baller.

WHAT’S INCLUDED IN THE PRICE?

  • Transportation to/from your guesthouse/hostel
  • Guide(s) fees
  • National Park entrance fee of Q50 (about $7)
  • 3 meals (lunch, dinner, next day’s breakfast) and hot cocao
  • The use of sleeping pad, sleeping bag and tent (already set-up at base camp)
  • Warm jackets to borrow. My company let us borrow daypacks too.

WHAT YOU NEED TO BRING?

  • Water. 2-4 litres of it. 2.5 litres was enough for me (I even had a little leftover and could have probably survived on 2) but I did the super hydration technique the day before in preparation where I drank 4 litres of water the day before, a technique I use before races or any dehydrating event. Try it yourself.
  • Warm Clothes. For the night and the early morning hike up to the summit.
  • Headlamp / flashlight

WHICH COMPANY TO CHOOSE?
I chose to go with Gilmer Soy. He organizes a co-operative model (not company) with profit sharing in the village employing single moms to cook and local guides.

The hikes are available every day, even on All Saints Day which was a holiday. As of now, he relies solely on email and Whatsapp but replies at lightning speed:

email: sologui5630@gmail.com
phone: +502 4169 2292

I am very happy with the way it was run. For me, the important thing is communication and professionalism. I cannot recommend them enough.

Many companies run this tour as well and you can find them all over Antigua. The guesthouses will use their own companies. At the end of the day, after you see the volcano erupt, you’ll be rating 5 stars anyway.


In the interest of keeping each post to the point, I’ve include extra tips and information in a separate post here.